Bots are useful to automate repetitive tasks like answering specific queries but do you know how to make a bot for a website without coding skills? Bots were once thought to be a computer geek phenomenon, developed by a selected group of people.
But now bots are easy to develop even if you are a non-programming folk. You even don’t require any coding or programming skills to create a bot. Search engines like Google and giant eCommerce like Amazon extensively employed bots on their website.
In this article, we will learn how a bot works and how to make a bot for a website in easy steps without coding and programming.
What Is A Bot?
A bot, typically known as a web robot, is software or program deployed on the websites to automate the tasks. Bots are employed for tasks that are automated or predetermined and do not require the intervention of a human.
The perfect example of bots is Google bots which crawl and monitor millions of web pages and websites. Apparently, manually scanning millions of websites is unfeasible, therefore bots take over them. Because they run over the programs, they are substantially faster than a human could be.
Bots are really advantageous, but they could also be dangerous and infect your computer with malware, which are known as bad bots, and they are leveraged by cyber attackers to conceal valuable data and monetary gain from a website. Also Learn How to take down a website from the internet.
How Do Bots Work?
Bots connect with each other via internet-based tools and operate over networks using a preset set of programs and algorithms. According to the experts, bot traffic on eCommerce sites accounts for more than 90% of all traffic because virtually all tasks are automated.
Majorly, two tasks are assigned to bots: interact with the coming traffic (usually with humans) and gather information from other websites. When you visit an e-commerce site, there is no person involved from making a selection of a product to getting an order for that product.
However, bots are not confined to these two functions; another prominent feature of bots is the chatbot, which is designed to address questions and provide responses to FAQs.
How To Make A Bot For A Website?
While knowing everything about bots, you might be eager to know how to make a bot for a website or for your own website. With the use of bot developing tools like appypie, landbot, chatcompose, etc.
For example in this post, I’m going to make an appointment bot using the appypie app, you can use any tool to make a bot for a website. By following the below steps, you can create a bot with zero coding knowledge.
Step 1. Give Name And Select Type Of Bot
- Go to this link to create your first bot.
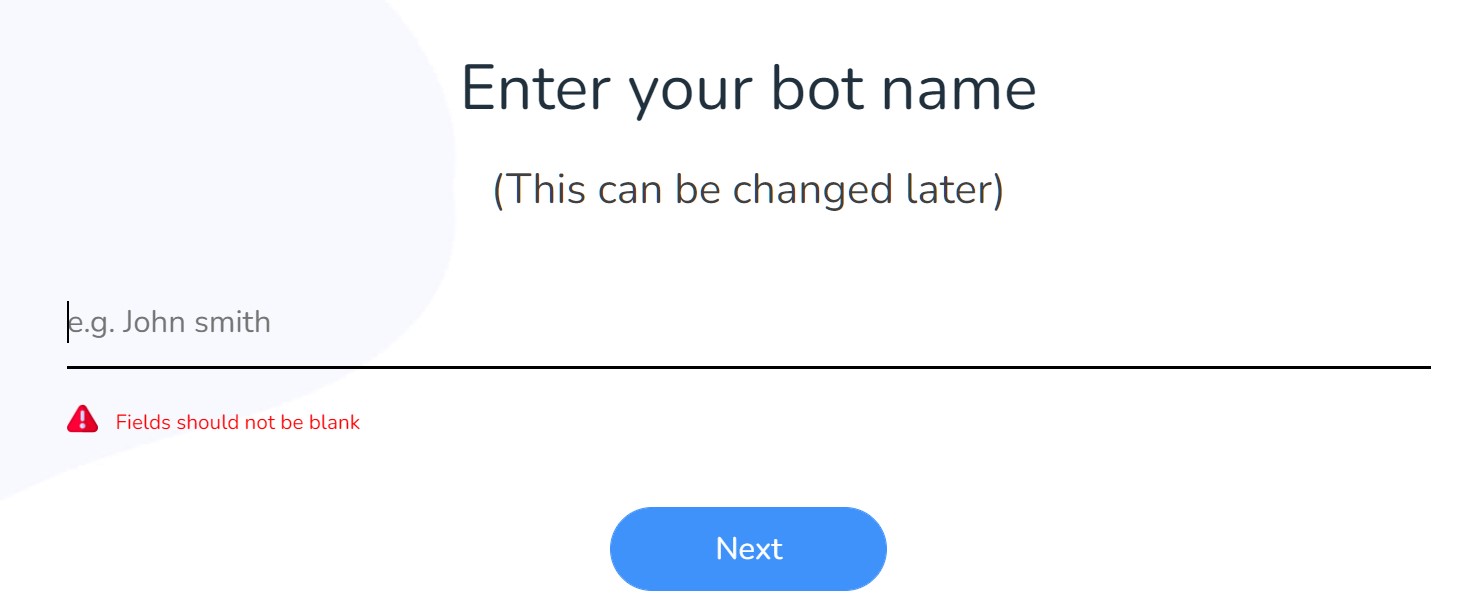
- Give a name to the bot (it could be anything). You can change it later.
- Click on the Next button.
- On the next screen, select the type of bot you want to create like inquiry bot, answer bot, appointment bot, item ordering bot, etc.

- For the learning purpose, I’m selecting an appointment bot among them.
- Once you click over bot type, it leads you to the preview page.
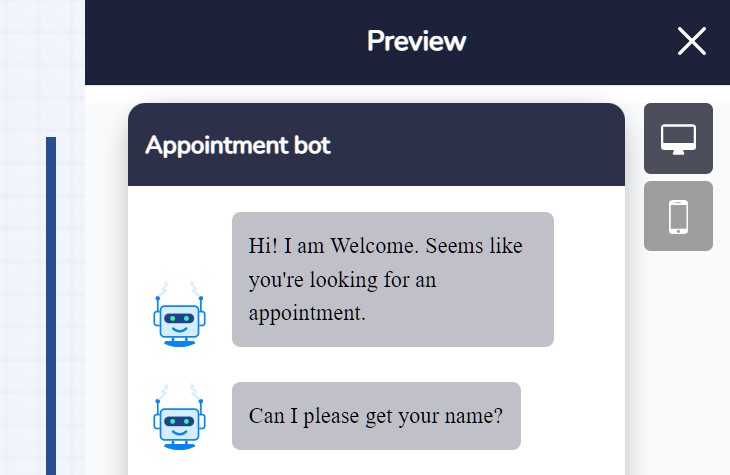
- The preview demonstrates how it looks to the user and how it interacts with the user.
- You can customize the bot color, logo, and appearance in the next section.
Step 2. Customize The Bot Interface
- When you preview, there is design customization on the same page.
- The first one is Basic Settings.
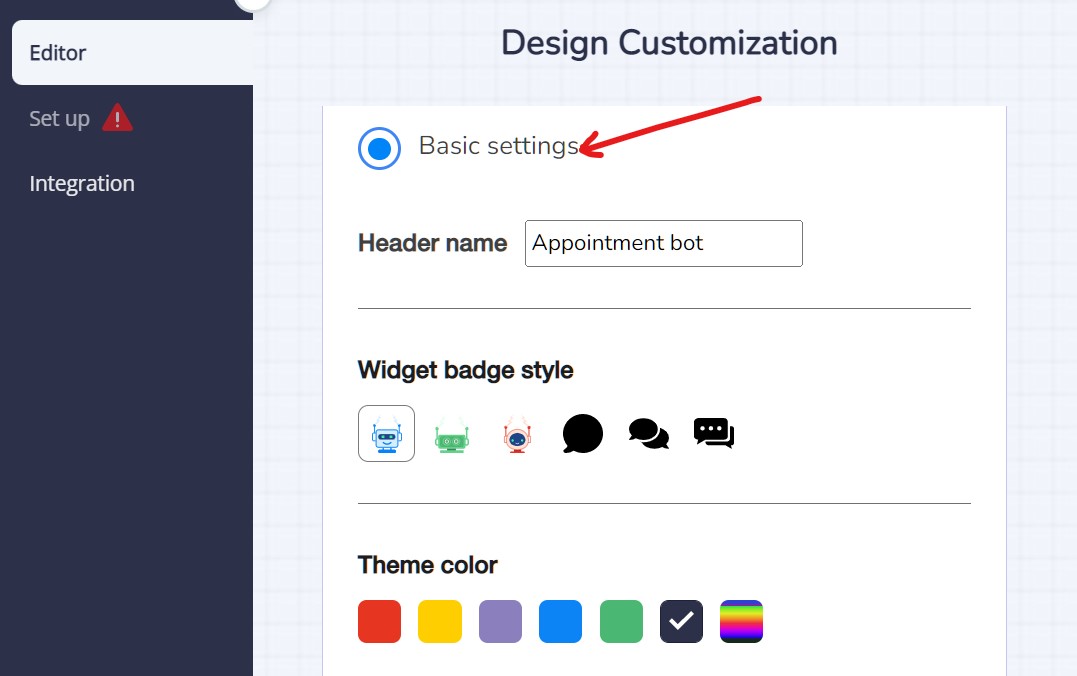
- Here, you can change the bot name such as in this case it is an appointment bot.
- Next, select the widget badge style. It is an icon or button available to initiate the chatbox.
- Select the theme color, it is the color that embeds in the background of text or chat.
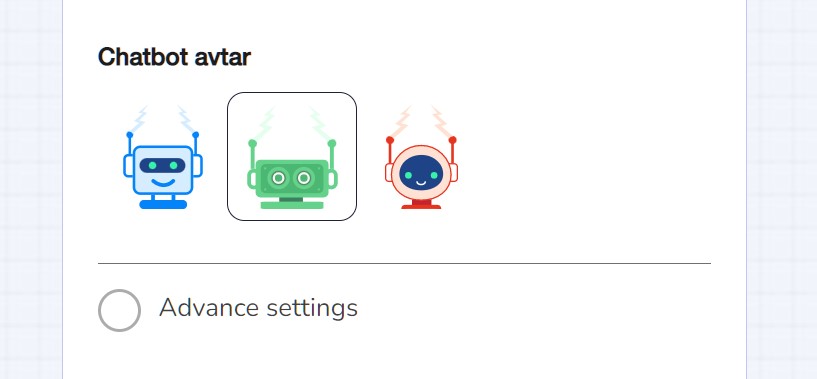
- In the next step, select a chatbot avatar that interacts with the user.
- Whatever changes you make to your chatbot, all the modifications displayed on the right-side preview section.
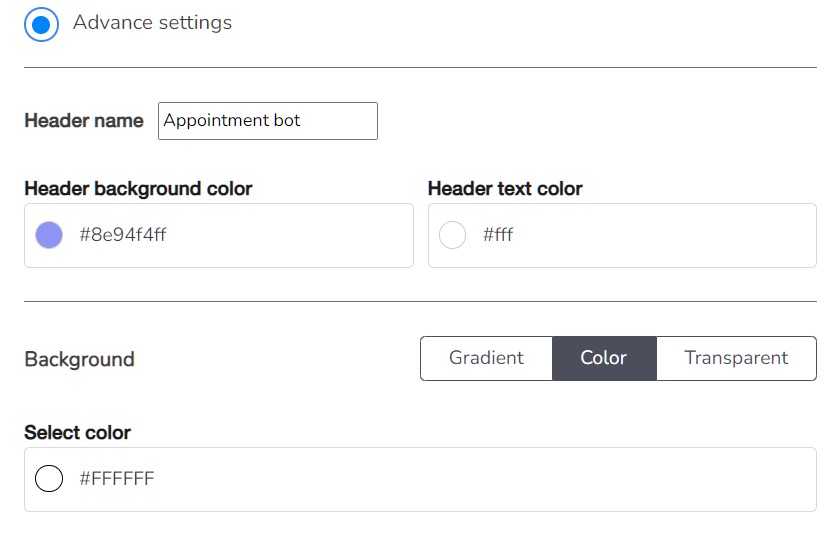
- Next click on the Advanced Setting toggle.
- You can change the message background color, font size, font style, change footer, logo, and company name.

- Click on the Save and Next button on the top right corner.
Step 3. Create Bot Flow (How Bot Will Work)
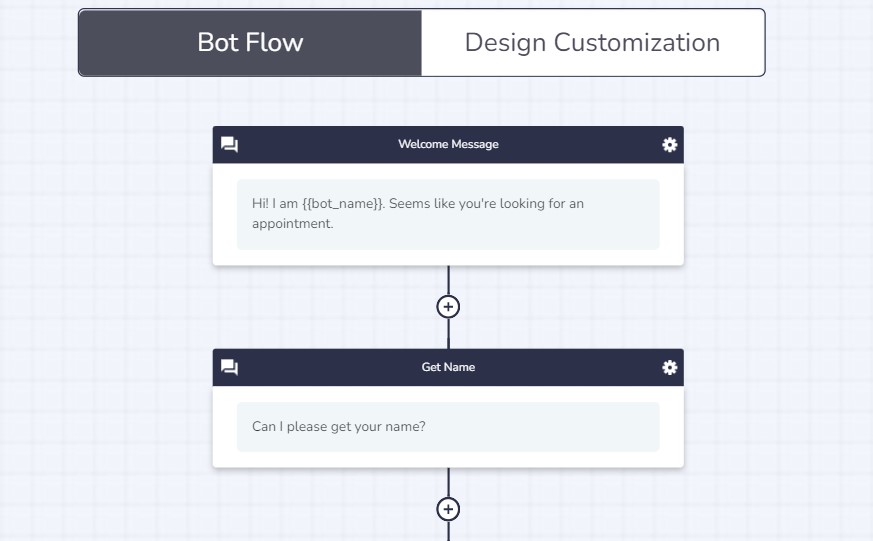
This is the crucial step for how to make a bot for a website using a bot tool. This option is available when you click on the save and next button. Bot flow ensures how the chat conducts when a visitor hit on the website.
- You can alter the flow easily and customize how the chat proceeds.
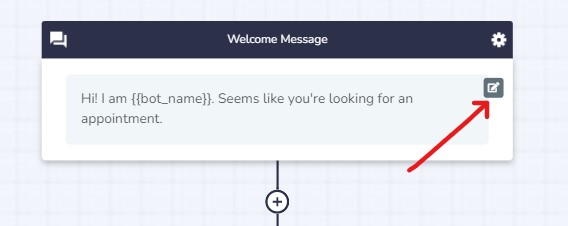
- Hover the mouse over an element that prompts a small edit button to modify the message inside this, click on it.
- When you click on the edit button, it enables you to alter the message or add a link.
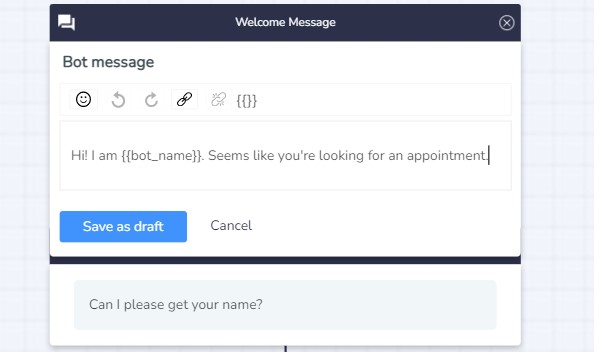
- Click on the save as draft button to save the message.
- If you wish to add more elements to a chatbot, click on the (+) icon to add nodes.
- Add as many nodes you want and customize how you would like it to appear to the users.
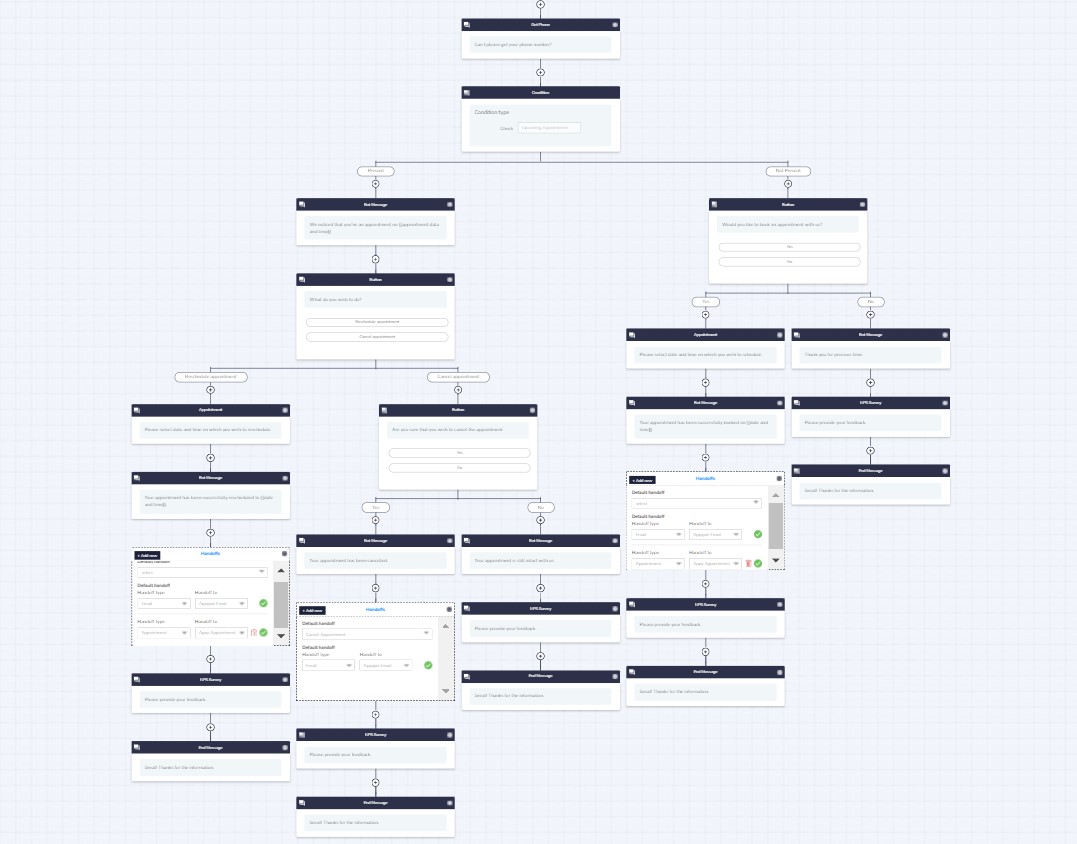
- The above snapshot illustrates how our bot communication will proceed once integrated with the website.
- Finally, click on the Save button at the top of the page.
Step 4. Get The Bot Script
This is the final step of how to make a bot for a website where you need to set up the recently created bot in your website. When you click on the Save button in the previous step, you have automatically taken to the setup page.
- Click on deploy bot in a third party CMS button.
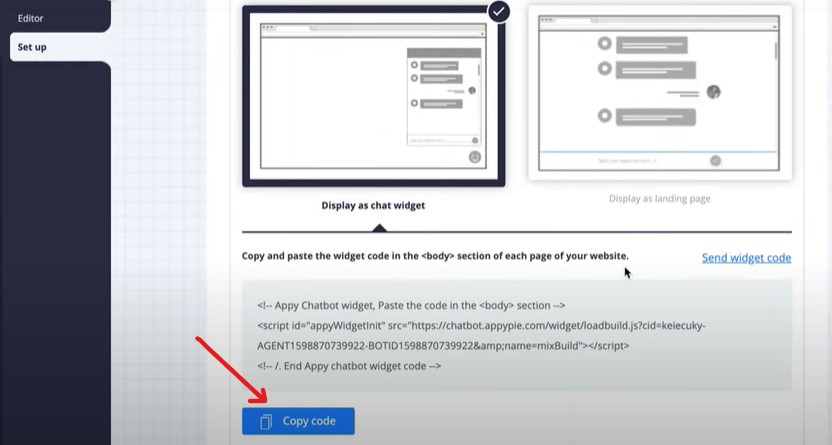
- On the very next screen, you will get your bot script.
- Click on the copy code to copy it and we will paste it to the website.
Step 5. Integrate Bot Into Your Website
You have got the script of your bot and now you have to add code to your website to activate the bot. For this, you must have insert headers and footers plugin, if you don’t have it then follow the below steps.
- Go to your WordPress dashboard.
- Head to the setting option and look for the insert headers and footers option which is usually the last option.
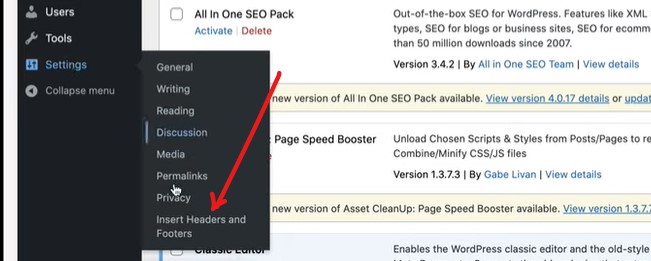
- If you don’t have this plugin, go to your plugin directory, type the plugin name, install and activate the plugin; Plugins>>Add New>>Search>>Install.
- With the insert headers and footers plugin, you can easily embed any code in your website.
- Once you land on this plugin, paste the copied script from the previous step.
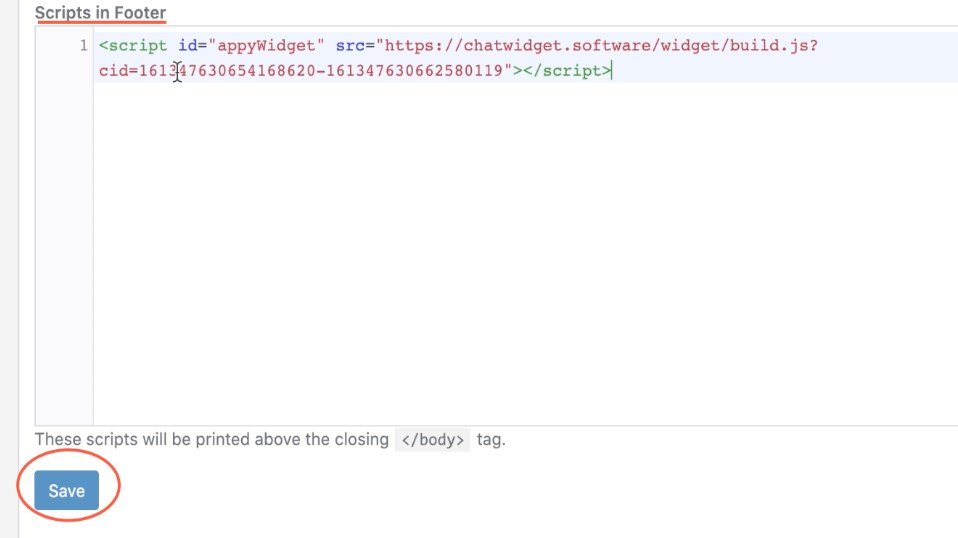
- Paste it to the scripts in footer and click on the Save button.
- You can also paste it in the header but the bot looks better in the footer section.
- Once all is done, refresh the web page or website, and you see that bot start appearing on the footer side of your website.
Final Thoughts
It is all about how to make a bot for a website without coding and programming skills. We successfully set up a bot on our website with zero coding knowledge with the Appy pie tool, however, you can use any tool to create a bot for a website by following the above steps.
Though python and other programming languages are alternate methods to develop a bot for a website yet they are complex. If you have extensive knowledge of programming and all, it is recommended to create your customized bot.
But if you don’t have these, then the above-mentioned method obviously the best solution. I hope you love this article and will be able to add a bot or chatbot to your website.


