
The Contact form is the best way to create a communication path with your users and visitors. Every website should have a contact form, so its users can easily communicate and submit queries. In this article, we will learn how to add contact form in WordPress in a step-to-step guide.
Unfortunately, WordPress doesn’t have any inbuilt feature to add a contact form to a site, but thankfully, it has tons of amazing plugins for this. You can easily create a contact form in WordPress within minutes only and provide a user interactive platform for visitors.
Why do you need a Contact Form in WordPress?
Before starting how to add contact form in WordPress, you may wonder that do you really need a contact form? Instead of that, why you shouldn’t add an email newsletter to my website and gain subscribers?
These questions are legitimate and notable, especially if you are a beginner. Your users can subscribe to your mail list and comment in the comment section; then, why there is a need for a contact form? Irritated by spammy comments? Read how to disable WordPress comments.
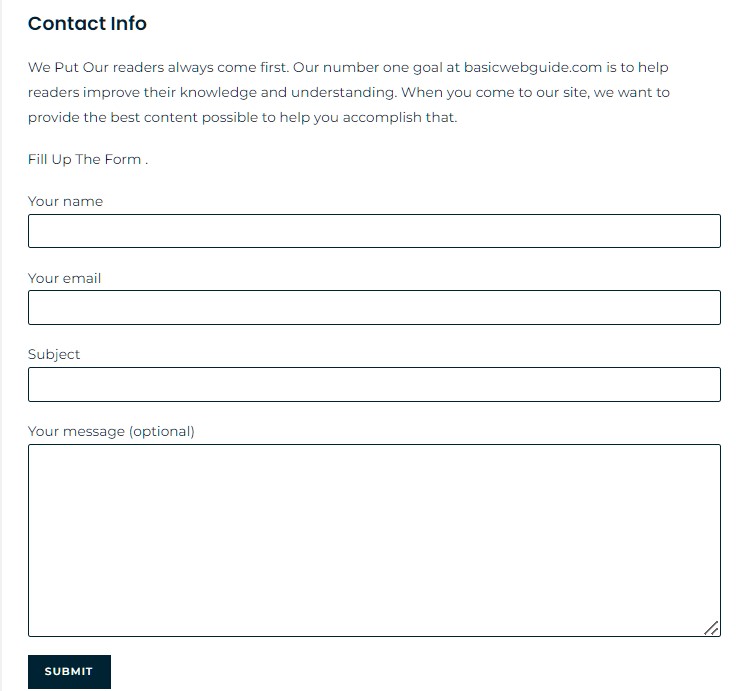
As you can see in the above screenshot, the contact form is not only like a subscribe email but a comprehensive form. Following are the reasons why add contact form in WordPress:
- Improve user experience: This is the most crucial reason to have a contact form on site. When a user visits the site and loves the content, and at the same time, he/she has a specific query related to service, then he can contact you easily by filling out the form.
- Professionalism: The contact forms offer a professional medium to resolve queries instead of bogus conversations on the comment box.
- Spam protection: Spammers are always targeting a site to pull down the authenticity by creating a “spam wall.” The email subscribing list is on the radar of direct attack with the bombardment of irrelevant emails. Contact form provides the solution and provides a secure as well as a clear communication path.
How to add contact form in WordPress?
Great! You have learned what is contact form and why it is important for your WordPress site. As I already mentioned that WordPress doesn’t have an in-built contact form, and you can create contact form with the plugin. Now, it is time to explore how to add contact form in WordPress in an easy way.
You can choose any plugin for creating a contact form at your convenience; however, I am using WPForms which is user-friendly and easy to use for this tutorial. Follow the step-by-step guide below to add contact form to your WordPress site.
Step 1. Install WPForms Plugin
- Log in to your WordPress dashboard and look for a plugin on the sidebar.
- Click on the Plugin option, which leads to the new page.

- Select add new button to search a plugin; Plugins >> Add New.
- Type WPForms on the search bar and hit enter button.
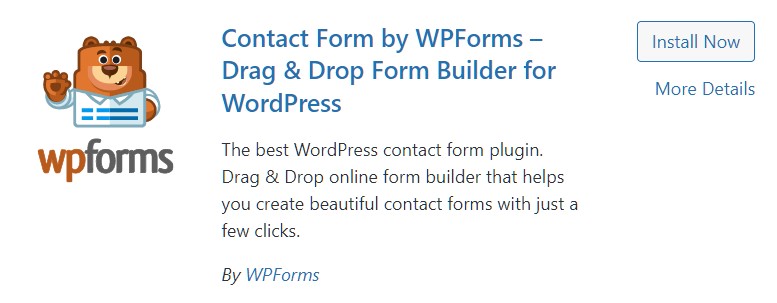
- Install and activate the plugin.
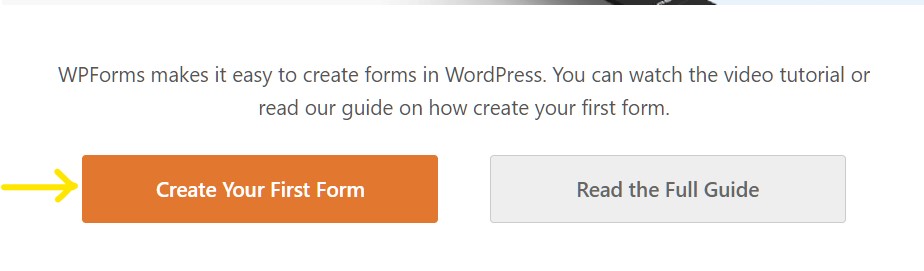
- Once activated, click on create your first form.
- If you already have WPForms, then it was on the sidebar; click on add new.
Step 2. Create a Contact form in WordPress
Now you are on the dashboard of a new contact form page. Name your contact form before starting building the form.
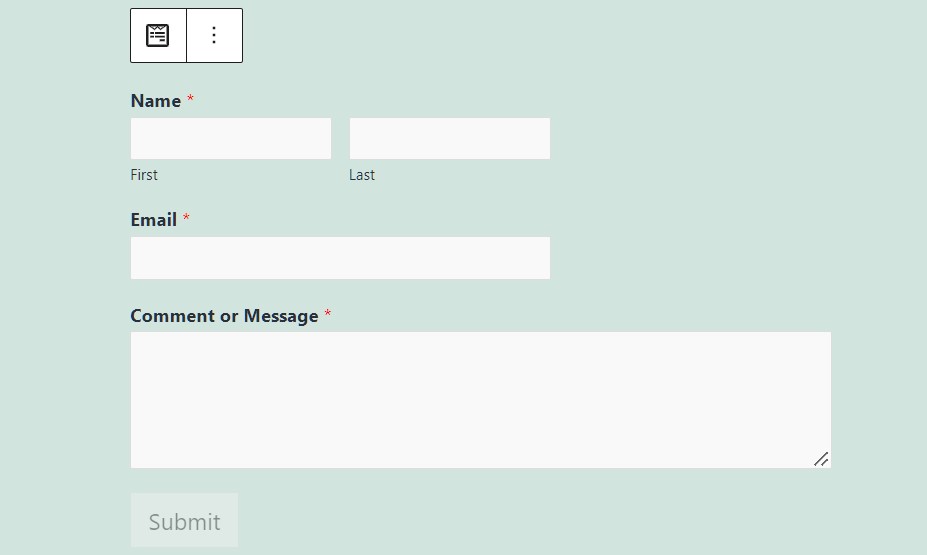
- You can see various templates like blank forms, newsletters, etc. For a basic understanding, I am selecting the Simple Contact Form.

- Hover the mouse over the simple contact form and click on Use template.
- The simple WordPress Contact form appears on the screen.
- On the left side, you can see various buttons and fields to edit.
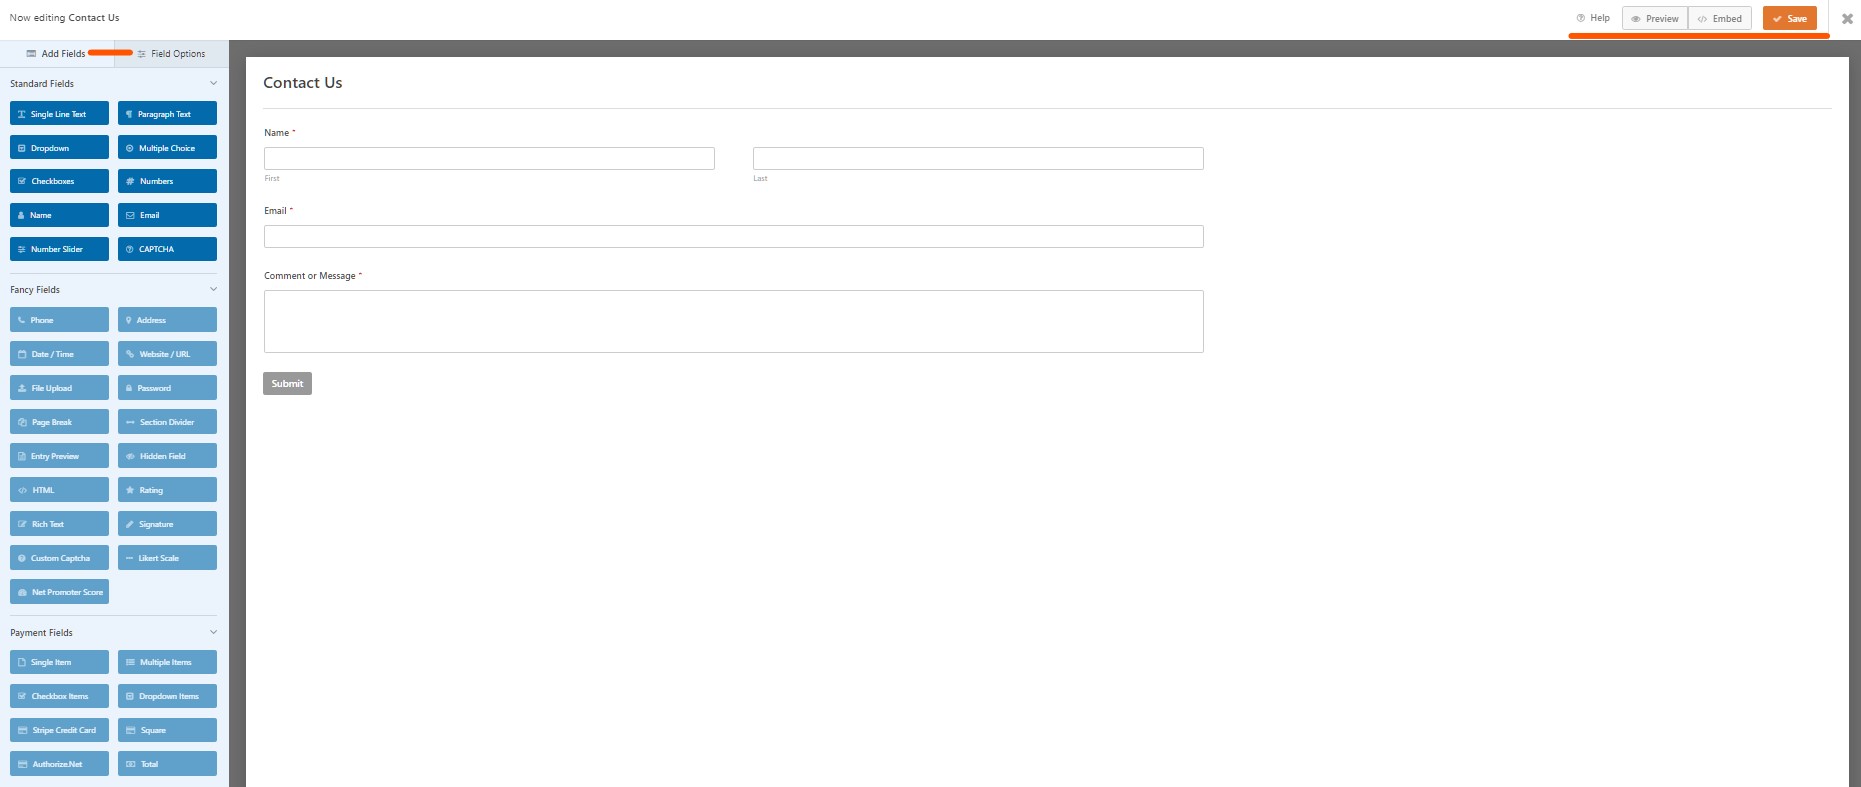
- Your changes are displayed on the right side.
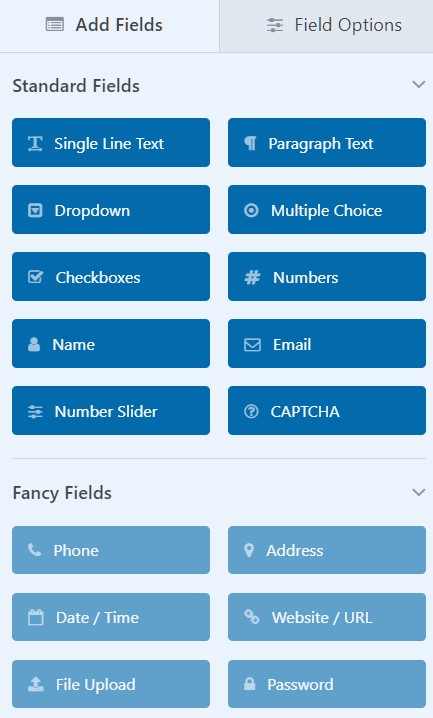
- You can add standard fields like drop-down, multiple-choice, fancy fields like website/URL, signature, and payment fields as well.
- Preview your editing and form at the top right side. If all are good, then click on the Save button.
Step 3. Add notification email and confirmation message
Notification email and confirmation message are two important aspects of a contact form. Once you have created a WordPress Contact form, you must configure these settings properly; otherwise, the Contact form loop is incomplete.
A notification email is a mail that you will collect after a visitor submits the form at your website. While the confirmation message is a message that is shown to a visitor who submits the form. Confirmation messages could be thank you, congratulations, etc.
- Stay on the contact form page that you just create and look for the settings tab.
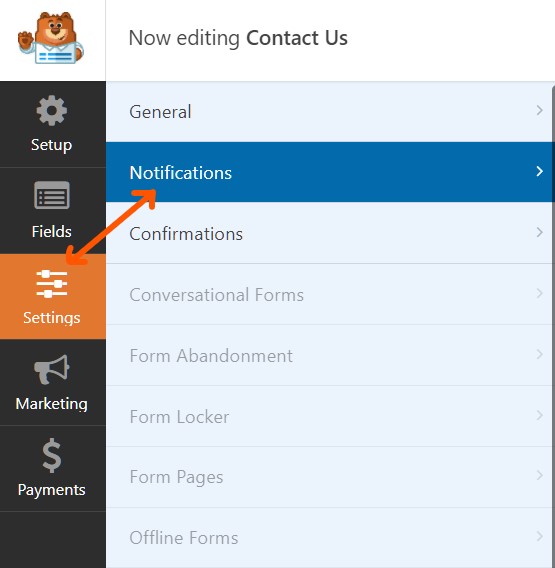
- Click on the Notification option.
- Notification editing options appear on the right side of the screen.
- Activate the enable notification toggle.
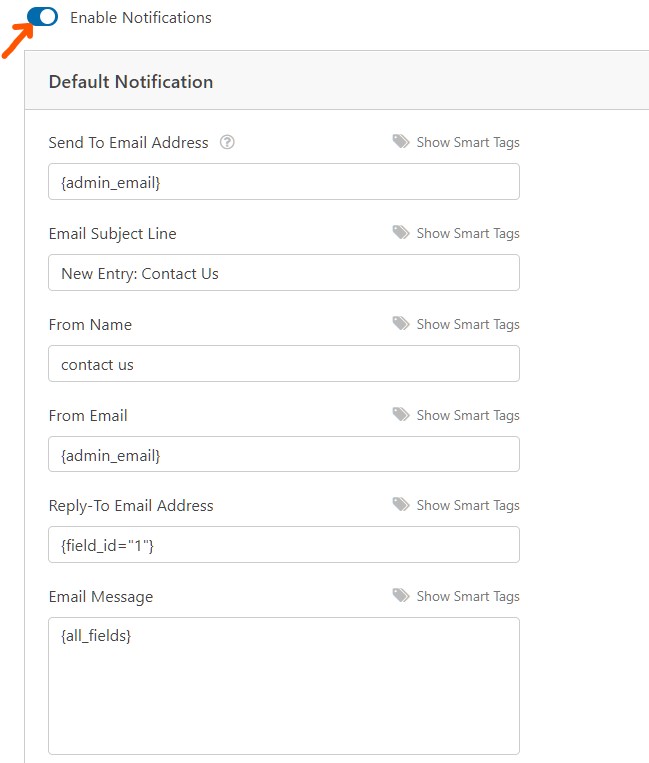
- Fill in the required areas like email sender, receiver, email subject, email message, and click on the Save button at the top of the page.
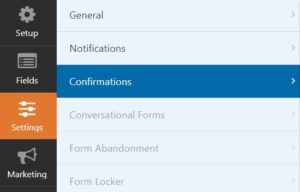
- Similarly, click on the confirmation option and start editing on the right side of the page.
- Select confirmation types like message, page, URL.
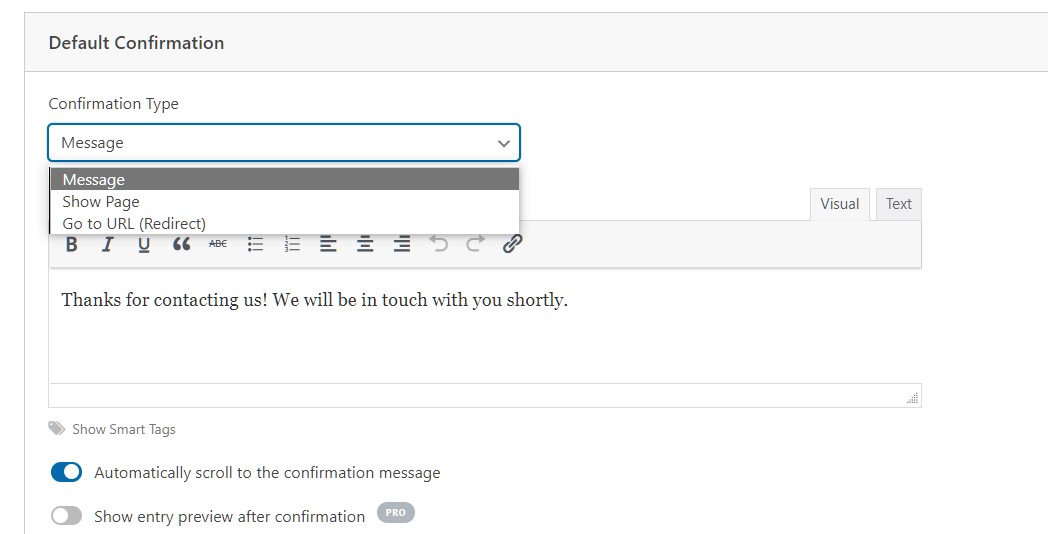
- Type your confirmation message what you want to show to the user and save the setting.
Step 4. Add WordPress Contact form to a page
Once you finished creating the Contact form settings, now time to add this form to the WordPress page. If you already have a suitable page then learn how to edit WordPress pages.
- Create a new page or add the contact form to an existing page; Pages >> Add New.
- New page open on your text editor.

- Look for WPForms on the editor (or click on the small + button and search WPForms) and add it as a new block to the page.
- Select your recently created contact form from the drop-down menu.
- The contact form will be loaded on the new page.
- Publish the page.
Congratulations! You have completed the tutorial on how to add contact form in WordPress. Now you can view the contact form page by visiting your website.
Step 5. Add contact form to the widget
This is the final but optional step of adding a Contact form to the site. This step is useful if you want to add Contact form to the sidebar or to the widget of the site.
- Go to the WordPress dashboard and look for the WPForms option.
- Head to the recently created contact form.

- In front of the form title, you can see the short code, copy it.
- Paste this shortcode to any page or post.
- Now again head to the WordPress admin area or dashboard.
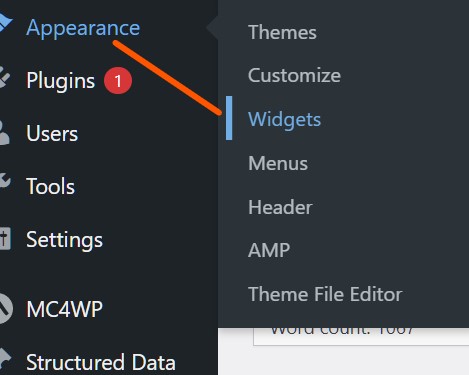
- Look for the appearance option then click on widgets; Appearance >> Widgets.
- Here you can see the WPForms widget.
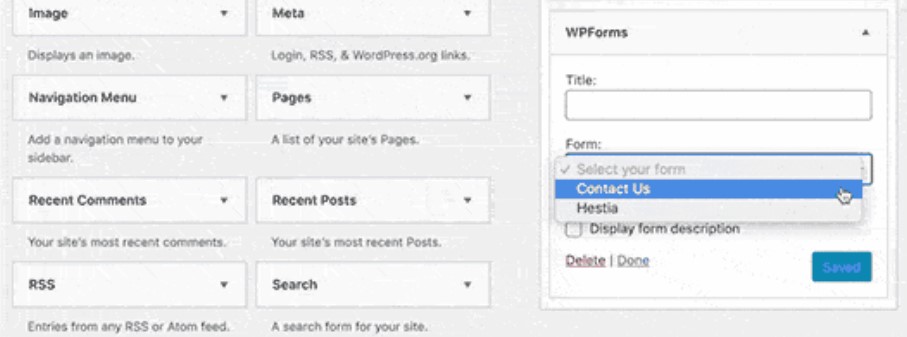
- Add a title to the widget whatever you want and select the contact form you created using the drop-down button.
- Finally, save the setting. You can either see the preview or visit the website to ensure everything goes according to the plan.
Final Words
This is all about how to add contact form in WordPress and I hope you like the tutorial. We have discussed the contact form and their necessity for a website in detail. If you follow this easiest guide on adding contact forms in WordPress, then I assure you that you will not face any issues.
WPForms is the best solution for pro bloggers as well as very convenient for new users. However, you can choose any other contact form plugin that suits you and follow this guide on other plugins too. If you face any problems while creating a WordPress contact form, let me know through comments.


Pingback: How To Add Tags On WordPress? What Are The Different Ways To Add Tags? - BasicWebGuide