As a website grows, the website owners have to make specific decisions to push it to the next level, and choosing the correct promotion approach is pivotal.
Rearranging WordPress posts is another common method for ensuring that the right post is served to the right audience.
In this article, we will explore how to reorder posts in WordPress easily. By default, WordPress enables all the posts in reverse chronological order, which means the most recent post appears on the website and WordPress dashboard too.
However, it is pretty easy to reorder WordPress posts in a specific desired order. Also, learn how to make WordPress sites private easily.
How To Reorder Posts In WordPress?

However, WordPress manages all the posts and pages in reverse chronological order, but there are a few methods to reorder WordPress posts and display specific posts on the front page.
Some prevalent methods include altering the publication date of posts, using reorder plugins, inserting reorder HTML code in PHP, etc. Let’s discuss all the methods to reorder posts in WordPress.
How To Reorder Posts In WordPress By Changing Post Publishing Date?
The easiest method to reorder WordPress posts is to change the post published date. As you may be aware, the most recently published post appears first; thus, if you update a post’s date, its position will change.
Suppose you intended to resurrect an older post; for instance, you’d have to update the date. For more clarification, implement the following steps:
- Go to your WordPress dashboard.
- Click on the posts section (on the left side).
- Select the post whose publication date you want to change.
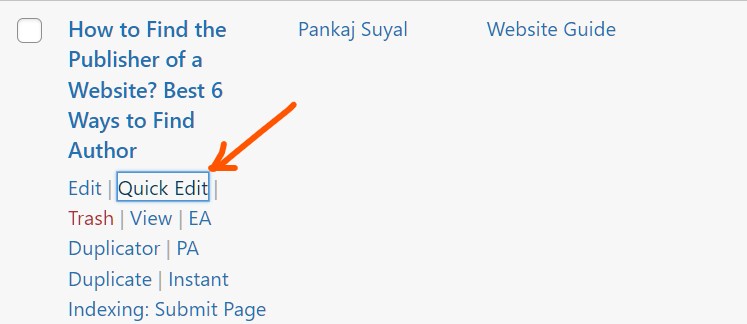
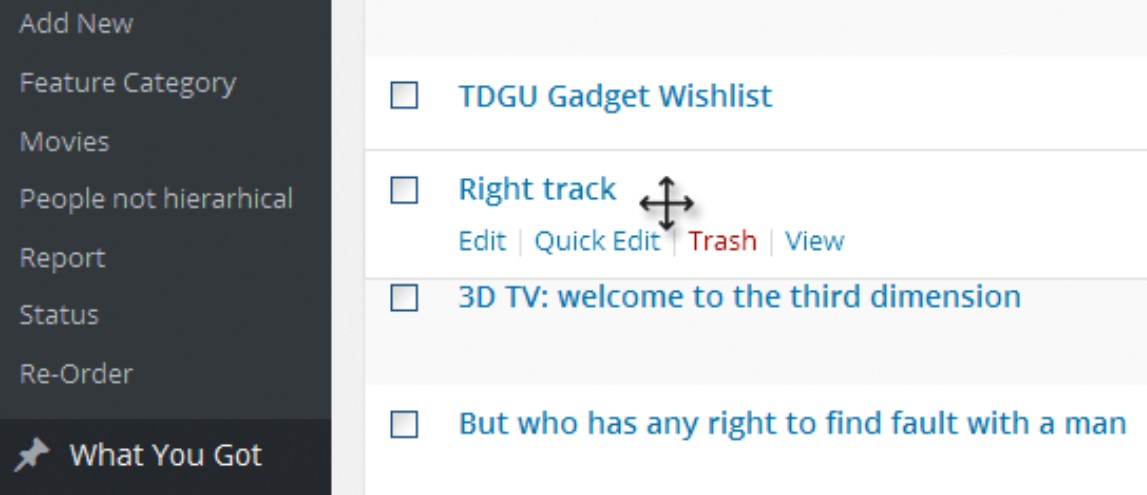
- Hover the mouse over the post title and select the Quick Edit button.
- Now, you have various editing options title, slug, and then date.
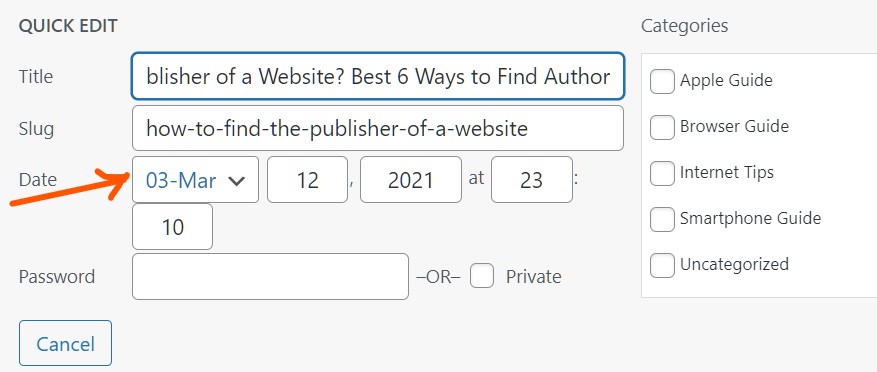
- Change the date as per your requirement by changing the date, month, year, and click on the Update button on the right side.
- Assume the date of publication was 03/12/2021 in the case above. If we change the date from 3 March to a more recent date, such as 3 April, this post will appear way earlier than any other post in the interim.
How To Rearrange WordPress Posts By Editing Function.PHP?
Don’t freak with coding! It gonna be quite straightforward. Because of a tiny snippet of code on the theme, WordPress puts all of the content in reverse chronological order. To reorder posts in WordPress, simply change the PHP code in the theme.
- Go to the WordPress dashboard.
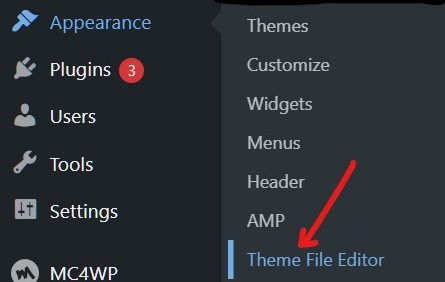
- Look for the Appearance option and then click on the Theme file editor option; Appearance>>Theme file editor.
- On the right side, look for the functions.php file; click on this.
- You can see the following code of piece in the file with the $query string, which defines the ordering of posts.
$query->set( 'order', 'DESC' );
- DESC means that by default, it enables posts in descending order.
- We need to alter this code in ascending (ASC) order to change the order. To do this, copy and paste the below code at the end of the functions.PHP file.
function wpb_custom_query( $query ) {
if( $query->is_main_query() && ! is_admin() && $query->is_home() ) {
$query->set( 'orderby', 'date' );
$query->set( 'order', 'ASC' );
}
}
add_action( 'pre_get_posts', 'wpb_custom_query' );- Instead of reverse chronological order, now your post will be displayed in chronological order.
- You can also change the order of the posts in any fashion you like; for example, you can create a random order by inserting the code below.
function wpb_custom_query( $query ) {
if( $query->is_main_query() && ! is_admin() && $query->is_home() ) {
$query->set( 'orderby', 'rand' );
}
}
add_action( 'pre_get_posts', 'wpb_custom_query' );Remember, to make any order other than DESC and ASC; you have to replace the order string with an orderby string, as illustrated in the above snippet. In this way, just by copying and pasting, you can reorder your WordPress posts.
How To Reorder Posts In WordPress Using Plugins?
Plugins simplify and automate any task, requiring essentially no effort from the user to execute the same activity. If you don’t want to mess around with updating postdates or inserting PHP codes, this approach is excellent for you.
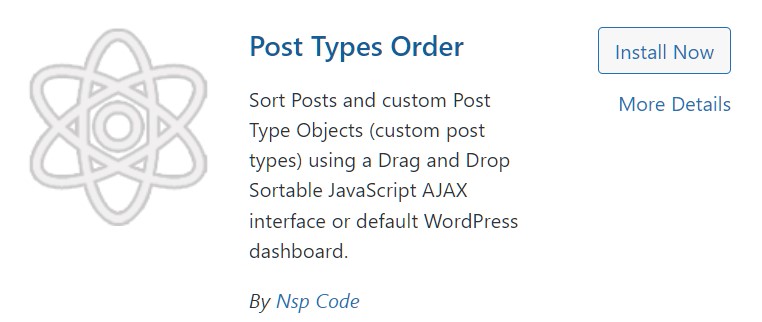
By using plugins, you just have to perform the drag and drop to reorder the posts. Though there are several plugins to reorder WordPress posts yet the simplest plugin is Post Types Order which you can download from the plugin directory.
- First of all, install and activate the Post Types Order plugin.
- Once activated, it will be added to the dashboard and can be accessed from the settings.
- Click on the Settings and then click on Post Types Order.
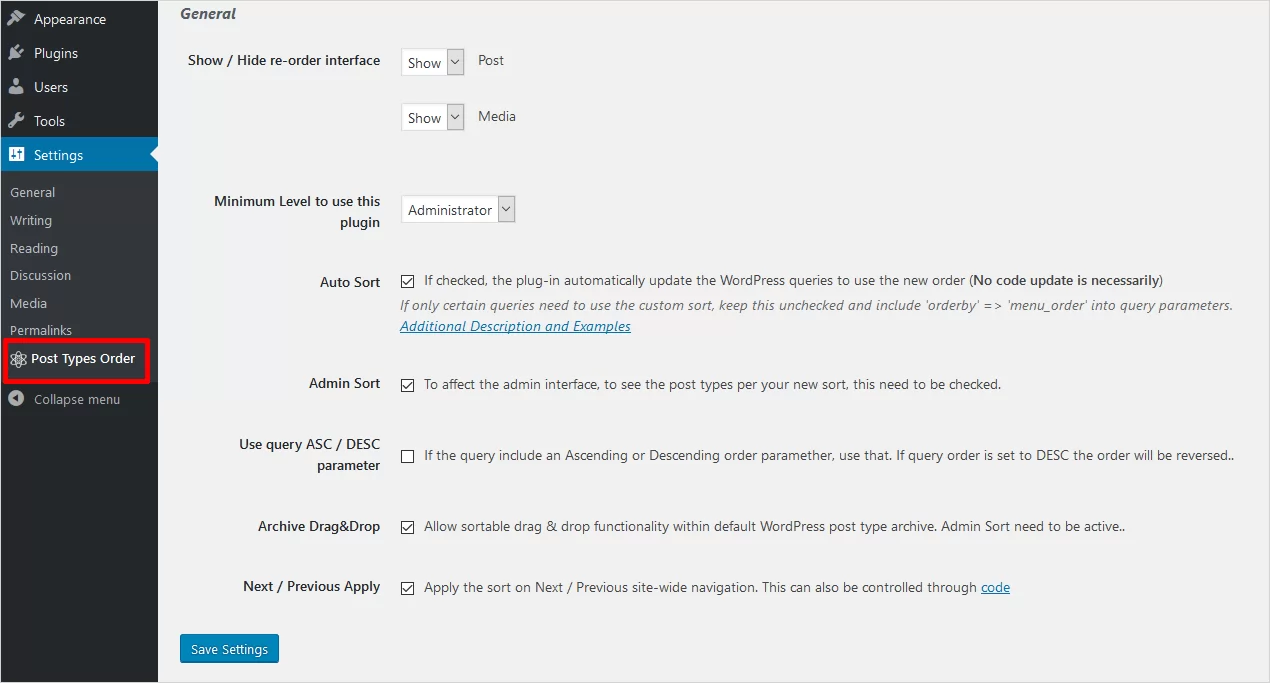
- There are various customization options available like hiding reorder interface, level of access to the user, etc.
- Now go to the Posts section; Posts>>All Posts.
- Simply drag and drop (up or down) and leave the pointer where you want it to be adjusted.
- You don’t have to worry about any coding or altering anything, just drag and drop any post or page.
Popular Reorder Plugins
- Chronological Post.
- Simple Custom Post Order.
- Intuitive Custom Post Order.
How To Reorder Posts In WordPress Using Sticky Posts Feature?
Most users are familiar with this feature, which allows you to make any WordPress post a featured post. The sticky posts function is a WordPress default function that enables you to showcase a specific post above all others on your blog or website.
Remember, this is not actually a reordering posts method, but it is an extremely useful tool to promote any specific (or sometimes trending post) on your main page or at the top of the blog.
- Go to your WordPress dashboard.
- Head to posts and then all posts; Posts>>All Posts.
- Hover the mouse over the post which you want to make sticky and click on the Quick Edit option.
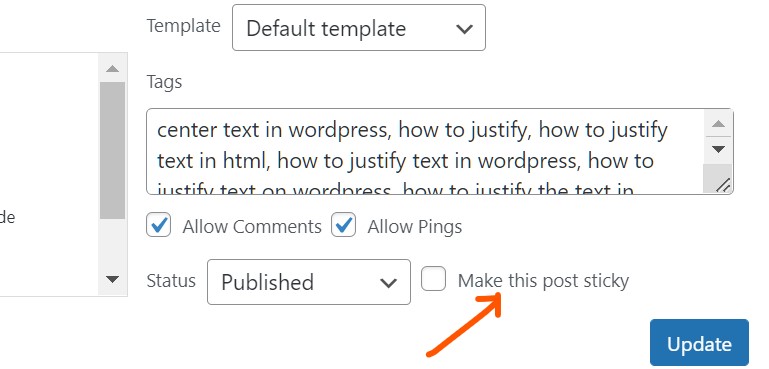
- Just below the tags and adjacent to Status, you can see the option “make this post sticky.”
- Click on the checkbox to make this option enable on the post.
- Now, this particular post will appear at the top of your blog posts.
Apart from quick editing, the sticky post option also appears on the editor of WordPress under Publish section; however, it depends on the theme you are using.
Final Thoughts
It is all about how to reorder posts in WordPress with 4 different methods; changing publish date, altering functions.PHP code, reordering plugins, and creating a post sticky. As you’ve seen, if applied correctly, these techniques are pretty simple.
As a site expands, it’s crucial to reorder WordPress posts since you need to show off your skills in order for visitors to trust your content. I hope this post helps you to reorder posts on WordPress website easily. Furthermore, any queries and suggestions are most welcome.